Buddies Buzz Blog

In the Buddies Buzz blog, you'll find the latest news about the community, tutorials, helpful resources and much more! React to the news with the emotion stickers and have fun!

Solliance hits 30.1% efficiency on perovskite/silicon tandem solar cell

Solliance hits 30.1% efficiency on perovskite/silicon tandem solar cell

The Netherlands Organisation for Applied Scientific Research (TNO), the Delft University of Technology, the Eindhoven University of Technology, and Belgian research institute Imec have achieved a 30.1% power conversion efficiency with a semi-transparent perovskite solar cell, combined with a crystalline silicon solar cell in a four-terminal tandem configuration. TNO, TU Eindhoven, imec, and TU Delft – partners in Solliance – joined forces to further push the conversion efficiency of tandem solar cells beyond the limits of today’s commercial photovoltaic (PV) modules. Four-terminal perovskite/silicon tandem devices with certified top cells pass the barrier of 30% for the first time. Such high efficiency enables more power per square meter and less cost per kWh.

The result was presented during the 8th World Conference on Photovoltaic Energy Conversion (WCPEC-8) in Milan and has been achieved by combining the emerging perovskite solar cell with conventional silicon solar cell technologies. The perovskite cell that features transparent contacts and is part of the tandem stack has been independently certified.

Additionally, achieving high-power density will create more opportunities to integrate these solar cells into construction and building elements so that more existing surface area can be covered with PV modules. Breaking the 30% barrier is a big step in accelerating the energy transition and improving energy security by reducing the dependency on fossil fuels.

The best of both worlds
Tandem devices can reach higher efficiencies than single junction solar cells because of better solar spectrum utilization. The currently emerging tandems combine commercial silicon technology for the bottom device with perovskite technology, featuring highly efficient conversion of ultraviolet and visible light and excellent transparency to near-infrared light. In four-terminal (4T) tandem devices, the top and bottom cells operate independently, making it possible to apply different bottom cells in this kind of device. Commercial PERC technology and premium technologies like heterojunction or TOPCon or thin-film technology such as CIGS can be implemented in a 4T tandem device with hardly any modifications to the solar cells. Furthermore, the four-terminal architecture makes it straightforward to implement bifacial tandems to boost the energy yield further.

From left to right: Yifeng Zhao (TU Delft) – Mehrdad Najafi (TNO) – Valerio Zardetto (TNO) – Dong Zhang (TNO). Photographer: Niels van Loon. (Image source https://www.tudelft.nl/ )

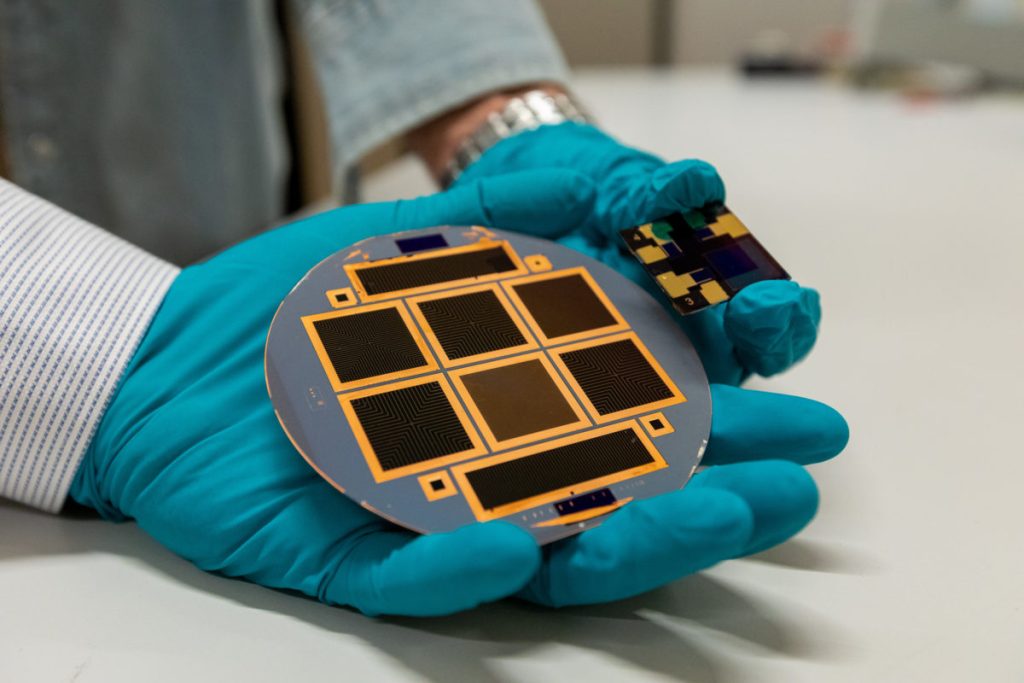
Researchers from the Netherlands and Belgium have successfully improved the efficiency of the semi-transparent perovskite cells up to 19.7% with an area of 3×3 mm2 as certified by ESTI (Italy). ‘This type of solar cell features a highly transparent back contact that allows over 93% of the near-infrared light to reach the bottom device. This performance was achieved by optimizing all layers of the semi-transparent perovskite solar cells using advanced optical and electrical simulations as a guide for the experimental work in the lab,’ says Mehrdad Najafi of TNO. ‘The silicon device is a 20×20-mm2 wide, heterojunction solar cell featuring optimized surface passivation, transparent conductive oxides, and Cu-plated front contacts for state-of-the-art carrier extraction,’ says Yifeng Zhao, a Ph.D. student at TU Delft, whose results have been recently peer-reviewed. The silicon device optically stacked under the perovskite contributes 10.4% efficiency points to the total solar energy conversion. Combined, 30.1% is the conversion efficiency of these non-area-matched 4T tandem devices operating independently. This world’s best efficiency is measured according to generally accepted procedures.

For more info please visit

The 5-Step Guide for Beginners to Creating and Selling NFTs

Non-fungible tokens, popularly known as NFTs are all the rage these days. In fact, NFTs have been garnering immense attention across the globe and the news around NFTs is doing rounds on the internet lately. This doesn’t come as a surprise, particularly when you constantly hear that people are ready to pay a whopping amount of money for these cryptocurrency assets that represent a unique and intangible digital item such as a photograph, a piece of art, an in-game collectible, etc. In other words, there are many NFT artists or creators out there who have made hundreds of thousands of dollars selling a single NFT.

Last year, a digital artist known as Beeple sold an NFT for 69 million USD, while many other artists managed to realize multimillion-dollar sales prices. The potential for making big money is not only encouraging more and more creators to jump on the bandwagon of creating NFTs but also driving the NFT market. According to a report published by DappRadar, a tracking company, trading in NFTs has skyrocketed from 100 million USD in 2020 to a whopping 22 billion USD in 2021. Furthermore, the average market cap of the top 100 NFTs amounts to 16.7 billion USD.

Here’s a step-by-step guide that you should follow religiously to create and sell your first cryptocurrency asset (NFT). Let’s get started.

1. Pick Your Item

First things first – you need to decide on what type of NFT you want to create (mint) since there are plenty of options to transform your digital assets into an NFT. It could be a text, picture, custom painting (artwork), meme, GIF, collectible, a ticket to events, video game, music, virtual items, etc. In other words, you can create an NFT for digital items in the form of a video, audio, or image file such as PNG, JPG, MOV, MP4, etc.

If you decide to create an NFT for items like a photo signed by a celebrity or an artwork, you may not require a developer. However, if you want to create NFTs for complicated items like a game, you may need the help of a seasoned professional. Furthermore, when minting an NFT, always make sure you own the intellectual property rights of the digital asset you want to convert into an NFT. Else, you may end up landing in legal trouble.

2. Decide on the Platform

Once you have determined the item you want to turn into an NFT, it’s time to decide on the platform. When it comes to finding the right platform to mint your digital asset, you’ll be spoilt for choice. Some of the most coveted marketplaces for NFTs include OpenSea, SuperRare, SolSea, Rarible, Mintable, Larva Labs/CryptoPunks, Nifty Gateway, and Axie Marketplace, to name a few.

It’s strongly recommended to do exhaustive research before you make the decision since each NFT marketplace has its own share of advantages and disadvantages. However, if you still struggle in deciding on the platform, you may get started with OpenSea since this NFT marketplace sold NFTs worth 3.4 billion USD in August 2021 alone.

These marketplaces enable newbies to foray into the realm of NFTs with ease. Some platforms may ask creators or artists to write their NFT on the Blockchain, while other platforms like Rarible and OpenSea enable creators to opt for shortcuts such as lazy minting. In lazy minting, you can do away with writing NFT on the Blockchain and put it up for sale.

3. Set Up Your Digital Wallet

After selecting the right marketplace for your NFT, you’ll have to connect it with your crypto wallet. If you don’t have a digital wallet, you should create one wherein you can store all your NFTs and cryptocurrencies. An important thing to keep in mind when creating a digital wallet is that you should consider the one that is compatible with the NFT marketplace you have selected to mint your NFTs. Though there is no dearth of crypto wallets, many NFT creators and artists prefer Coinbase Wallet, AlphaWallet, Metamask, Trust Wallet, and Math Wallet.

4. Start Creating Your NFT

Once you have connected your digital wallet to the NFT marketplace, you can now create your first digital asset (NFT). Listed below are the steps that you need to follow to create an NFT.

  • If you have selected Rarible as your NFT marketplace, click on the blue “Create” button present on the Rarible’s homepage at the top right.
  • Select whether you want to create a single copy of your crypto asset (NFT) or want to sell the same item several times by creating multiple digital copies.
  • Now, upload the digital file you have at your disposal to create your NFT
  • Once your file is uploaded successfully, you will be asked how you would like to sell your crypto asset. When creating an NFT, it’s not necessary to put the digital asset on sale at the same time. After the minting process gets completed, you can put it on sale afterward.
  • Select whether you would like to offer a premium quality version of your crypto asset (NFT) or want to add unlockable content through a webpage or using a secret downloadable link.
  • Add a catchy title and description, and provide all other relevant details pertaining to your NFT artwork.
  • Mention the royalty percentage you would like to receive on secondary sales.
  • Mention your digital file specifications such as size, font, or color in pixels.
  • Now, click on the “Create” item.
  • Congratulations, you have minted your first crypto asset (NFT)

Sell Your NFT

  • Once you have minted the tokens, it’s time to put them on sale
  • To find the newly created non-fungible tokens, click on Profile> My Items
  • Now click on the sell button

Summing Up

Creating and selling NFTs is not as complicated as it seems. You can easily create the non-fungible tokens and sell them online by simply following the steps aforementioned in this informative piece. Now, what are you looking for? Start making the best use of your assets and who knows you might be able to sell your crypto assets at a whopping price someday and join the million-dollar NFT club.

How To Fix The Outlook Not Responding Error

From time to time, a lot of people will experience the Outlook not responding error on the computer and they may get stuck while updating the inbox. One problem that is common is when Outlook freezes up and doesn’t work. In this article, we’ll show you what you can do to fix this issue in a few easy steps.

What is the Outlook Not Responding Error?

The Outlook not responding error is a common error that can occur when you are using the Outlook application. This error can be caused by a number of factors, including a corrupt email account, a problem with the Microsoft Exchange server, or a problem with the Outlook application itself.

There are a few things you can do to try and fix the Outlook not responding error. First, you can try restarting the Outlook application. If that doesn’t work, you can try deleting your email account and then re-adding it. Finally, if all else fails, you can try uninstalling and then reinstalling the Outlook application.

Why is the Outlook Not Responding Error Happening?

One of the most annoying things that can happen when you’re trying to get work done is when your computer starts acting up. One of the most common issues is when Outlook stops responding.

There are a few different reasons this might happen, and luckily, you can do a few things to try and fix the issue.

  • One reason Outlook might stop responding is that it cannot connect to the Exchange server. It could be because the server is down or something is wrong with your network connection.
  • Another reason for this error is if there are too many items in your Outlook mailbox. When there are too many items, it can slow down Outlook and cause it to stop responding.

If you’re getting the Outlook not responding error, try restarting your computer.

Method 1: Stop Outlook using Task Manager

When Outlook is not responding, the first thing you should try is to end the process using Task Manager.

  1. Press Ctrl+Shift+Esc to open the Task Manager. If you see the User Account Control dialog box, click Yes.
  2. On the Processes tab, find and select OUTLOOK.EXE in the list of processes.
  3. Click End Process at the bottom of the window. A warning message appears, click Yes to confirm that you want to end the process.

Method 2: Disable Faulty Add-ins in Outlook

If your Outlook not responding, it may be caused by a faulty add-in. To disable a faulty add-in:

  1. Go to the File tab and click Options.
  2. Click the Add-Ins category.
  3. In the Manage drop-down list, select COM Add-ins and click Go.
  4. Uncheck the box next to the add-in you want to disable and click OK.

Method 3: Update Microsoft Outlook

If you’re using Microsoft Outlook for your email, you’ll want to make sure that you keep the application up-to-date. Here’s how to update Outlook:

  1. Open the Microsoft Store app on your computer.
  2. In the search bar, type in “Microsoft Outlook.”
  3. Once the application comes up, click on “Update.”
  4. If there aren’t any updates available, it will say “You’re up to date.” Otherwise, the updates will begin downloading automatically.
  5. Once the updates are finished downloading, click “Restart & Install.”
  6. The installation process will take a few minutes to complete. Once it’s done, Outlook will open automatically.

Method 4: Start Outlook in Safe Mode

If Outlook is having problems, one troubleshooting step you can try is to load Outlook in Safe Mode. This mode starts Outlook without loading any add-ins or extensions, which can sometimes interfere with the program.

  1. To start Outlook in Safe Mode, close the program if it’s open. Then, press and hold the Ctrl key while you double-click the Outlook shortcut on your desktop (or right-click the shortcut and select Run as Administrator).
  2. When the User Account Control prompt appears, click Yes to continue.
  3. A new instance of Outlook will open in Safe Mode.

You’ll know it’s running in this mode because “Safe” will appear in brackets after the program name in the title bar.

Conclusion

In conclusion, the Outlook not responding error is a common issue that people may face while updating their inbox. While this can be frustrating, there are some steps that can be taken to fix the problem. By following the troubleshooting steps outlined in this article, you should be able to get your Outlook up and running again in no time.